Starting seeds indoors is one of the simplest ways to grow healthy, strong plants. A seed starter kit gives seeds a protected environment to germinate and get established before being transplanted into larger containers or outdoors.
This guide walks you through how to use your seed starter kit from start to finish.
Recommended Products
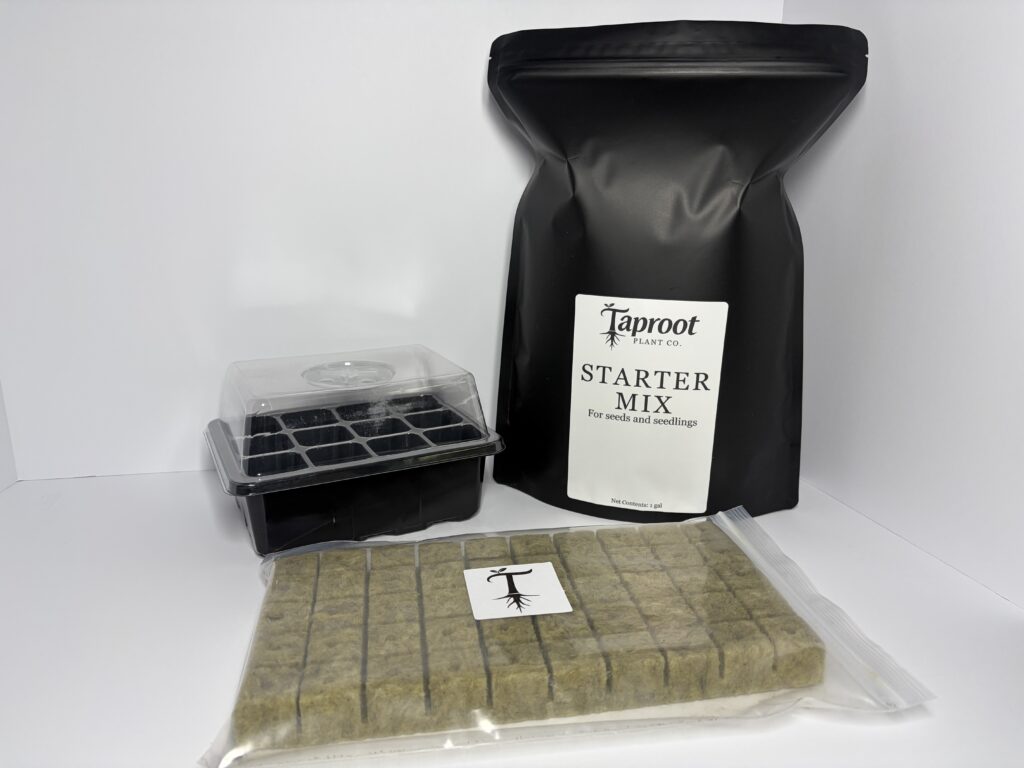
What’s Included
Your seed starter kit includes:
- Seedling Tray
- Starter Mix
- Propagation Cubes
You may also want seeds, water, plant labels, and a bright window or grow light.
Before You Start
Choose a clean workspace and gather everything before opening the kit. Starting with a simple setup helps avoid overwatering, overhandling, or uneven planting depth.
A few basic tips before planting:
- Use clean hands and clean tools
- Label your seeds before or right after planting
- Read the seed packet for crop-specific planting depth and timing
- Keep the tray somewhere warm after planting
- Have your light ready for when seedlings begin to emerge
Choose Your Starting Method
This kit gives you two ways to start seeds:
Option 1: Starter Mix
Use the starter mix to fill each tray cell and plant directly into the mix.
Option 2: Propagation Cubes
Place one propagation cube into each tray cell and plant directly into the cube.
Choose one method per cell. Do not fill a cell with starter mix and also place a cube into that same cell.
Step 1: Prepare Your Starting Medium
Prepare whichever medium you plan to use.
If Using Starter Mix
Add water gradually until the mix feels evenly moist. It should hold together slightly when squeezed, but no water should drip out. If the mix starts out dry or resistant to water, stir thoroughly and give it a little time to absorb moisture evenly.
Loosely fill each tray cell with the moistened mix. Do not pack it tightly. Lightly level the surface.
If Using Propagation Cubes
Moisten the cubes fully, then let them drain or gently squeeze them so they are moist but not soaked.
Place one moistened cube into each tray cell.
Roots need both moisture and air, so avoid compressing the media too much.
Step 3: Plant the Seeds
Check the seed packet for the correct planting depth. A common guideline is to plant seeds about two to three times as deep as the seed is wide, though some seeds should only be pressed onto the surface and not covered.
Place one or two seeds in each cell or cube opening, depending on the seed type and your preference. Cover lightly if needed.
After planting, water gently or mist lightly so the seed stays in place and the surrounding material settles around it.
Step 4: Use the Humidity Dome
After planting, place the humidity dome over the tray to help hold in moisture during germination. At the beginning, keep the vent closed so the humidity stays as high as possible.
This helps prevent the cells from drying out too quickly and creates a more stable environment for seeds to sprout.
Once seedlings begin emerging, start increasing airflow gradually by opening the vent or removing the dome for short periods. After most seedlings have sprouted, the dome should usually be vented more or removed so excess moisture does not stay trapped around the young plants.
Step 5: Keep Moisture Consistent
The goal during germination is even moisture.
- If the surface begins to dry out, add a small amount of water
- If the cells stay soggy for too long, reduce watering
- Avoid leaving excess standing water for long periods
The medium should stay moist enough to support germination, but not saturated enough to limit airflow around the seed.
Step 6: Provide Warmth and Light
Most seeds germinate best in a warm environment. After they sprout, strong light becomes especially important to keep seedlings from stretching.
A few general guidelines:
- Keep the tray in a warm area during germination
- Once seedlings emerge, place them under strong light right away
- If using a window, choose the brightest one available
- If using a grow light, keep it close enough to prevent legginess without overheating the seedlings
If seedlings become tall, thin, and weak, they usually need more light.
Step 7: Thin the Seedlings
If more than one seed sprouts in a cell, keep the strongest seedling once they begin growing well.
Instead of pulling the extra seedling out, snip it at the surface. Pulling can disturb the roots of the one you want to keep.
Step 8: Water Carefully as They Grow
Once seedlings are up and growing, continue watering gently. Young roots can be damaged by constant saturation or by drying out completely.
Check moisture regularly and water only as needed. The cells should not stay bone dry for long, but they also should not remain waterlogged.
Step 9: Transplant at the Right Time
Seedlings are usually ready to move up once they have developed a stronger root system and a few sets of true leaves.
At that point, transplant them into larger containers or into the garden if conditions are appropriate. Handle seedlings by their leaves rather than their delicate stems whenever possible.
If moving them outdoors, harden them off first by gradually introducing them to sunlight, wind, and outdoor temperatures over several days.
Common Mistakes to Avoid
Overwatering
Seedlings need moisture, but constantly soaked media can slow growth and increase the risk of rot.
Underwatering
If the cells dry out too much, germination can stall and young seedlings can decline quickly.
Leaving the Dome On Too Long
The humidity dome is useful early on, but once seedlings emerge, they need more airflow. Leaving the dome sealed for too long can trap too much moisture around young plants.
Weak Light
Insufficient light leads to stretched, unstable seedlings.
Planting Too Deep
Seeds buried too far down may fail to emerge.
Final Tips
Seed starting does not need to be complicated. The goal is simple: give seeds a clean, moist, airy environment with the warmth, moisture, and light they need to grow.
Check your tray daily, make small adjustments, and let the seedlings do the rest. A steady routine usually produces better results than constant changes.
Your seed starter kit is designed to make the process easier and more repeatable, whether you are starting herbs, vegetables, flowers, or other garden plants.
Leave a Reply